Deployment of FlexxAgent with Group Policy (GPO)
FlexxAgent can be deployed using group policies in Windows (GPOs). You need access to the agent installation package, which can be downloaded from the Flexxible portal.
Deploying
-
Create a Powershell
scriptcalledInstall.ps1with the following content:Start-Process
Path to the file\FlexxAgent-Installer.exeExample: Start-Process
C:\Temp\FlexxAgent-Installer\FlexxAgent-Installer.exe
Note: Make sure that, apart from the executable, the line includes the necessary installation parameters, such as the proxy, if needed.
- Save the file for later use.
- Run the group policy management console in a domain controller that has remote computer management tools installed.
- Create a new group policy within the group policy container.
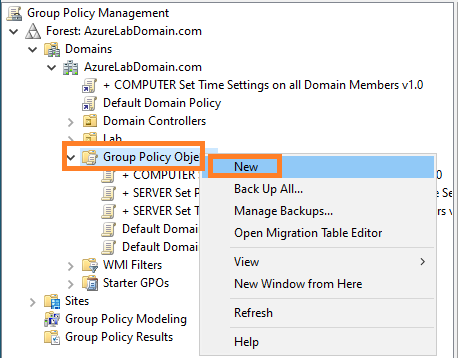
- Give the new policy a name. Choose one that is meaningful.
- Right-click on the group policy and select
Edit. - Expand the tree
Computer Configuration->Windows Settingsand selectScripts (Startup/Shutdown)

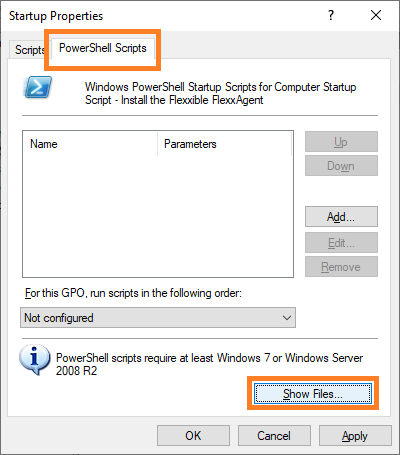
- A dialog will appear in a new window. Select
PowerShell Scriptsin it. Next, click on theShow Files…button
-
The network folder where the scripts for the group policy are stored will open.

-
Copy the file
Install.ps1that was created at the beginning and paste it into the network folder for storing Group Policy scripts.

- You can now close the Windows Explorer window that accessed the folder with the group policy scripts.
- The startup script properties modal window will be visible again. Click on the
Add…button. - A file selection dialog will appear. Find the script to use by clicking on the
Browse…button. - The previous path will open, where the file created at the beginning of the procedure will be. Double-click on it or select it and click the
Openbutton. - Once the file is selected, select
Okto close the dialog. The file will appear in the configuration modal window. - Select
OKto close this window. You'll return to the group policy editor. This window can be closed. - Find the organizational unit branch, within the domain controller where the computers for FlexxAgent installation are located. Select the branch and right-click on it. Select
Link an Existing GPO.
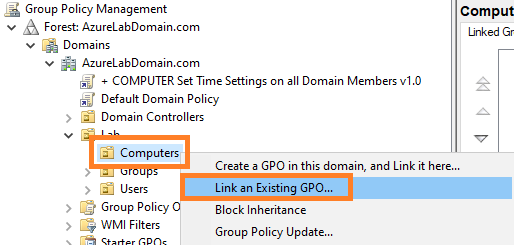
- A selection dialog will appear where the previously created policy will be selected. Once selected, click
OK.
Verification
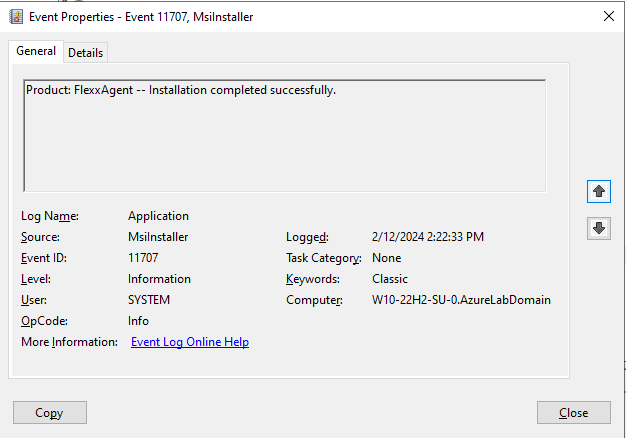
To validate the installation of FlexxAgent within a domain machine, restart a machine in the domain for the group policy to take effect. After the restart, access the application event log and you will see several events generated during the installation and initial run of FlexxAgent, including:
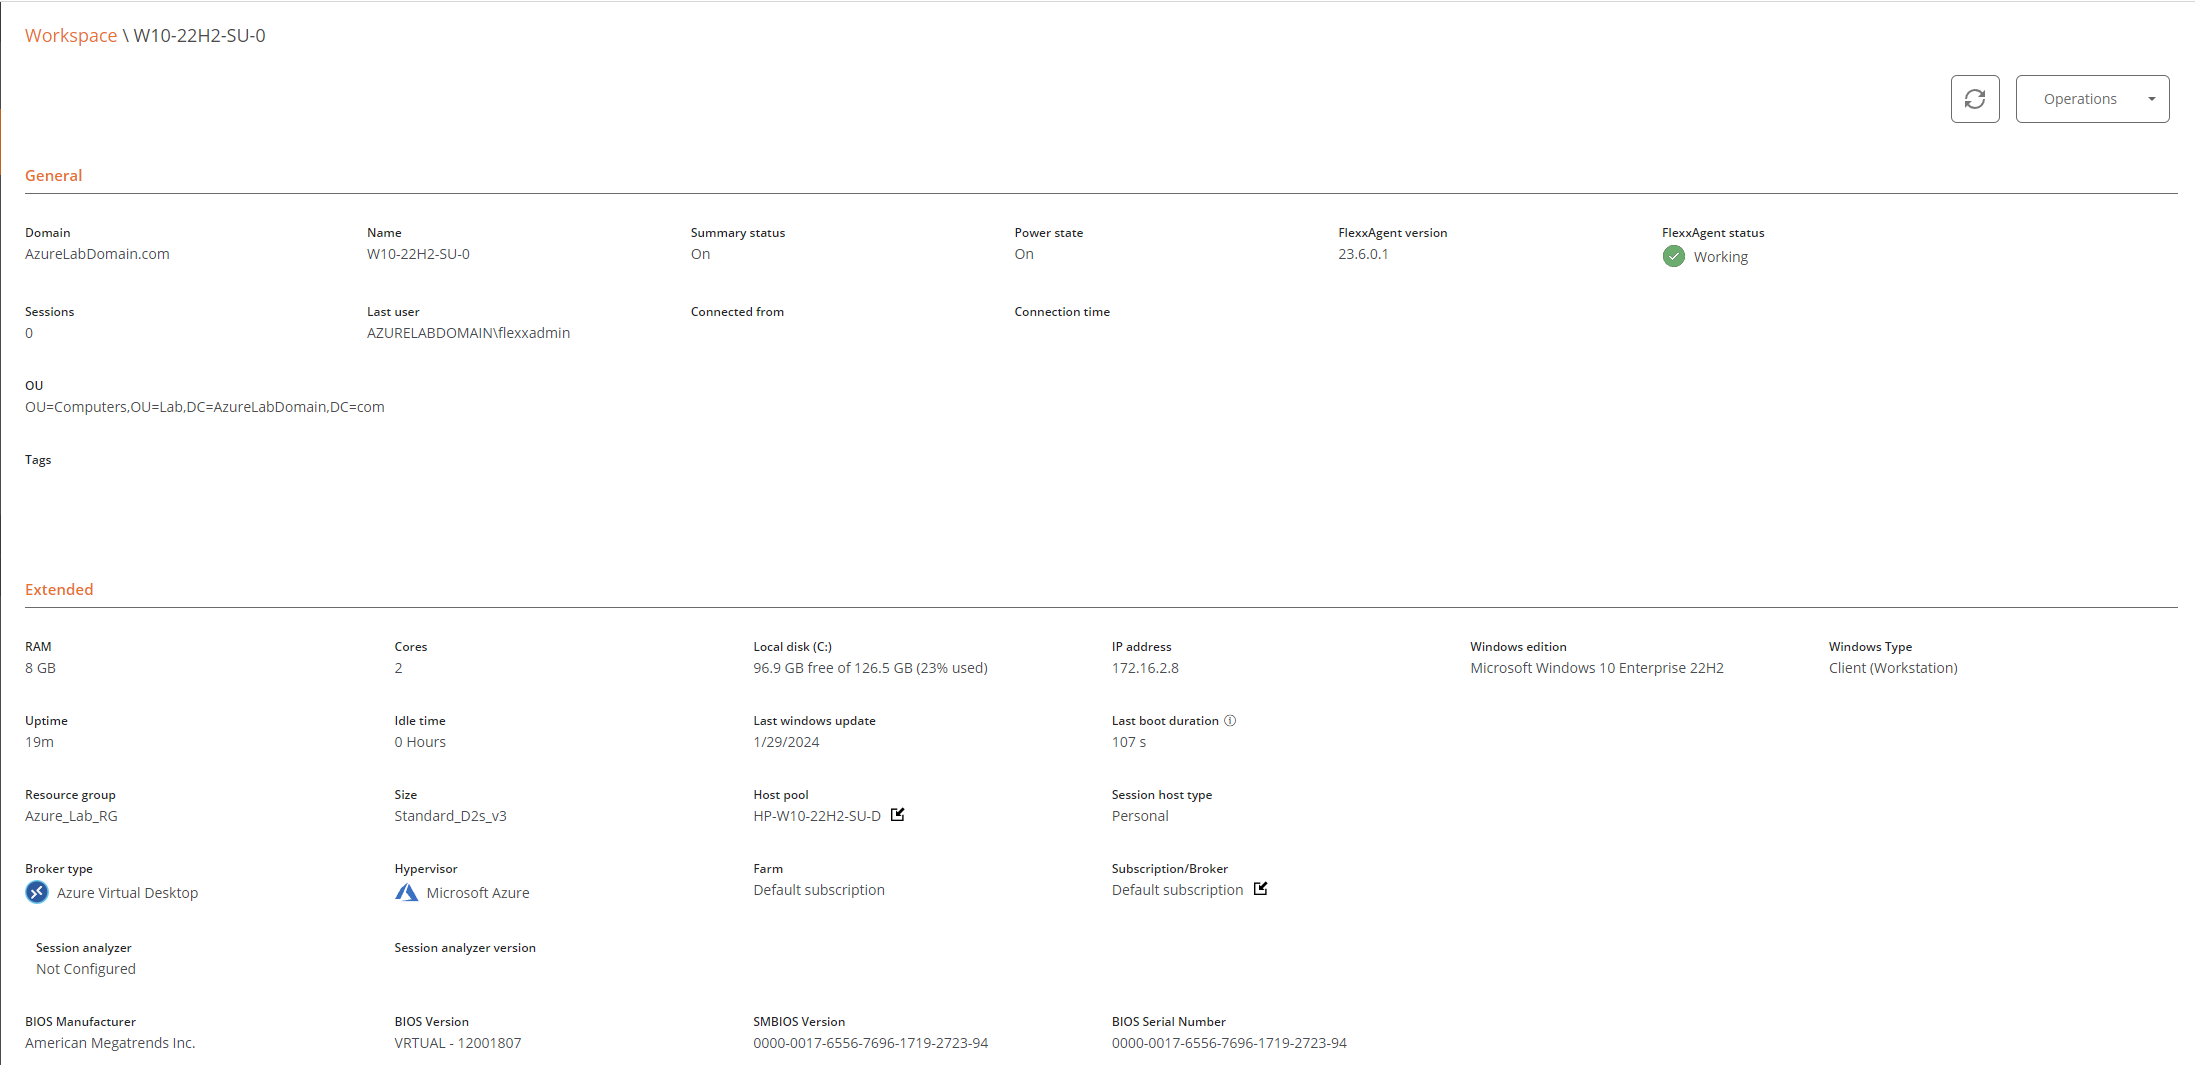
After a few minutes, you will see the new device registered in the Workspaces module and in the Workspaces view of the Portal.
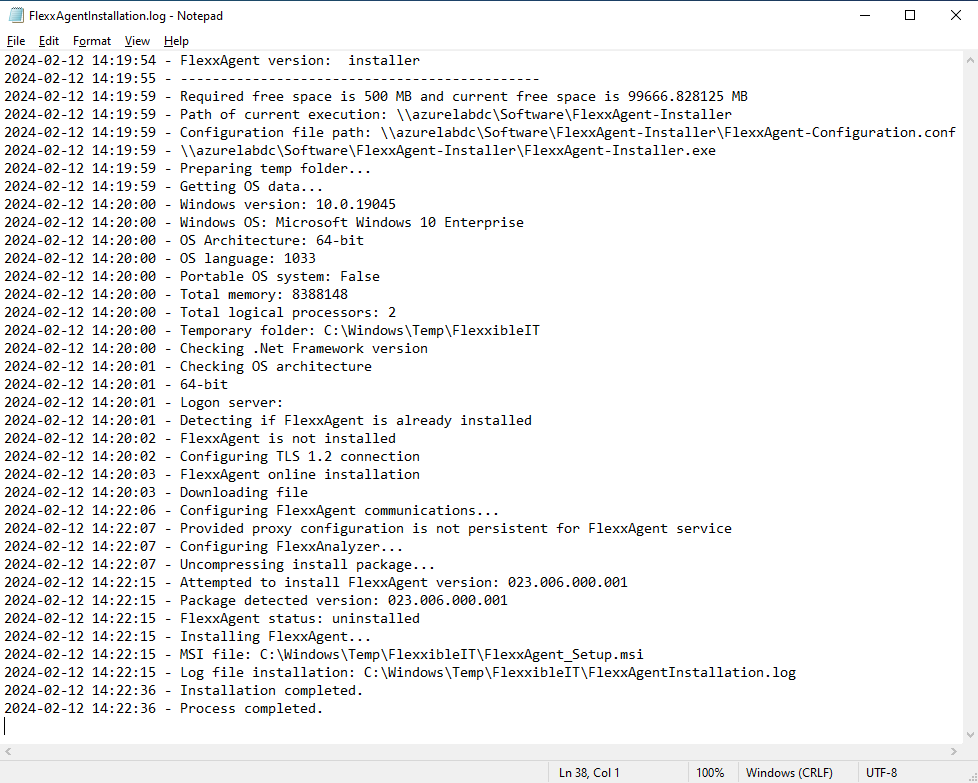
The installation log can be seen in detail in the file C:\Windows\Temp\FlexxAgentInstallation.log.
