Microsoft patch policies
While Targets are used to define when, how, and to whom updates are applied, Microsoft Update Policies define what gets updated; that is, it manages the approval or denial of the installation of one or more updates from the Microsoft catalog on an organization's devices.
Create a new update policy
-
Access
Portal->Updates->Microsoft Update Policies. -
Click
Newat the top right of the interface. -
In the form, assign a name to the new policy.
-
Click on
Save.
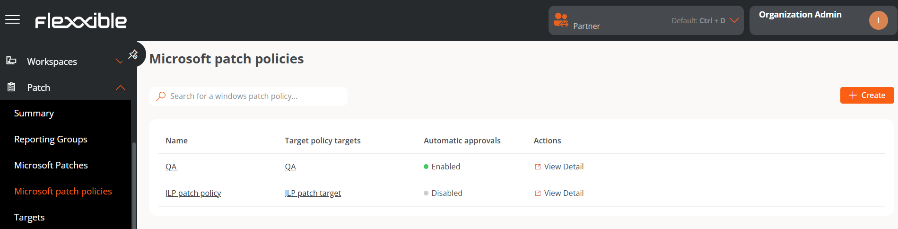
The newly created policy will appear in the table, along with the following fields:
- Update policy targets. Targets configured with a Microsoft update policy.
- Automatic Approvals. Indicates whether the automatic approvals setting is Enabled or Disabled.
- Actions. Contains the
View Detailsbutton, which allows access to the configuration scopes: Details, Microsoft Updates, Automatic Approvals, Uncataloged Updates, and Uncataloged Automatic Approvals.
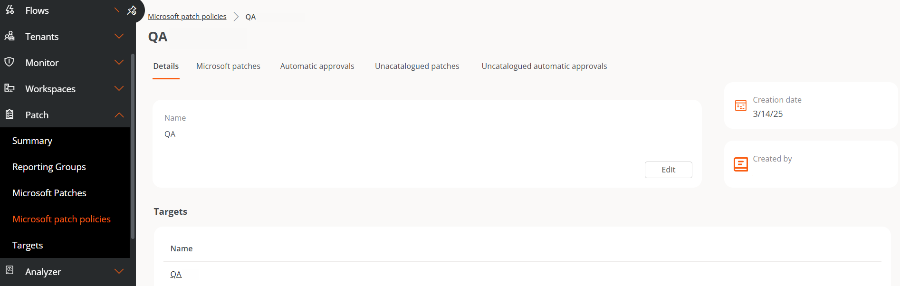
Details
From this tab you can view basic information about the policy:
- Name
- Linked Targets
- Created date
- Creator User
The Edit button opens a form that allows you to modify the policy's name or delete it.
Microsoft patches
This tab shows a table listing the updates available for the linked target, along with the following data:
- KB. Unique identifier assigned to the Microsoft update package. Some drivers or firmware do not have an assigned KB.
- Revision Description. Link to detailed information about the update.
- Status. Status of the update: Approved, Rejected, or Pending.
- Product. Name of the Microsoft product to which the update applies.
- Severity. Level of urgency detected for executing the update.
- Release Date. Date from which the update is available.
- Classification. Category assigned to the update. It can be Updates, Critical Updates, Security Updates, Upgrades, Definition Updates, Drivers, Feature Packs, and Update Rollups.
- Last Update. Date and time of the last modification of the list.
Above the table there are several filter options that allow listing updates by Classifications, Products, Replaced, or Release Date.
It is also possible to search by text strings or filter by status: Pending Approval, Approved, or Rejected.
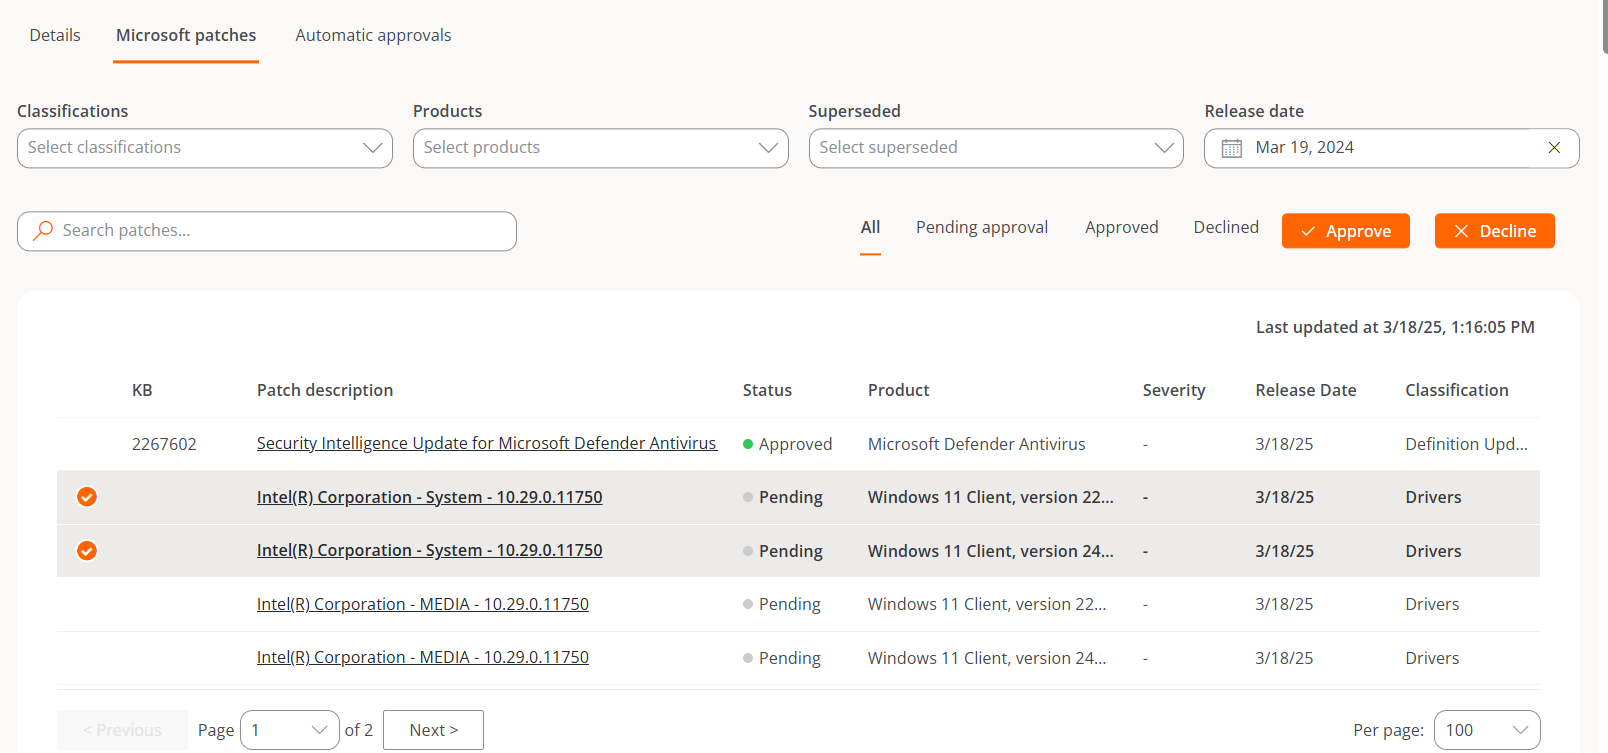
Manually approve or reject an update
To approve or reject an update, select one or more entries from the table and choose the desired action:
-
Approve. The update will be installed on the corresponding devices the next time an update process is run, according to the target configuration.
-
Reject. The update will be attempted to be uninstalled during the next update process on devices that have it installed, according to the target configuration.
Not all updates can be uninstalled. The execution of this process depends on the current state of the device and other factors. The result of the uninstallation attempt will be available in the corresponding update task.
If a user defines a Microsoft update policy but does not manually or automatically approve or reject an update package, no installation or uninstallation activity will be generated on the devices.
Automatic Approvals
This tab shows a table with the configured automatic approval rules. The fields include the following information:
- Classification. Category assigned to the update.
- Products. Name of the Microsoft product to which the update applies.
- Days After Release. Number of days elapsed since the publication of the update, after which it will be automatically approved.
- Actions. Contains the
View detailbutton, which opens a form to edit the automatic approval rule.
Create an automatic approval rule
It's possible to configure one or more automatic approval rules within the same update policy.
To create a new rule:
-
Access
Portal->Updates->Microsoft Update Policies. -
Select a policy.
-
Go to the
Automatic Approvalstab. -
Click on
Newand define:- Classifications
- Products
- Days After Release

Automatic approvals are executed once a day, at 6:00 a.m. Therefore, any change in the configuration of automatic approval rules will not be applied immediately, but will normally take effect the next day.
-
It is recommended to configure automatic approval rules when creating a new policy and not apply it to the target until the updates to be considered as starting point are approved. That way, when the policy is applied, you can start from a stable scenario.
-
If automatic approval rules are configured, it is recommended to do so for uncataloged updates as well, in order to prevent patches from being left unapproved.
Unlisted updates
The global list of pending updates on a device can be consulted in Microsoft Updates; however, there are patches that the device may report as pending but do not appear in that list.
Unlisted Updates correspond to these cases. These are pending patches that may be related to Microsoft features but do not have an exact match with the catalog entries.
The list of unlisted updates is displayed at the tenant level.
The table shows the available uncataloged updates with the following data:
-
KB. Unique identifier of the update package. Some drivers or firmware do not have an assigned KB.
-
Revision Description. Link to detailed information about the update.
-
Status. Approved, Rejected, or Pending.
-
Product. Name of the Microsoft product to which the update applies.
noteUncataloged updates are reported by FlexxAgent according to the information obtained from the device; however, sometimes Windows does not provide information about the associated Product. For this reason, this field may appear empty.
-
Severity. Level of urgency detected for executing the update.
-
Release Date. Date since the update is available.
-
Classification. Category assigned to the update.
The table has filter options by Classifications, Products, or Arrival Date, as well as text searches and filters by status.
Manually approve or reject an uncataloged update
To approve or reject an uncataloged update, select one or more entries from the table and choose the corresponding action:
-
Approve. The update will be installed on the devices in the next update process, according to the target configuration.
-
Reject. The update will be attempted to be uninstalled during the next update process, according to the target configuration.
Not all updates can be uninstalled. The execution of this process depends on the current state of the device and other factors. The result of the uninstallation attempt will be available in the corresponding update task.

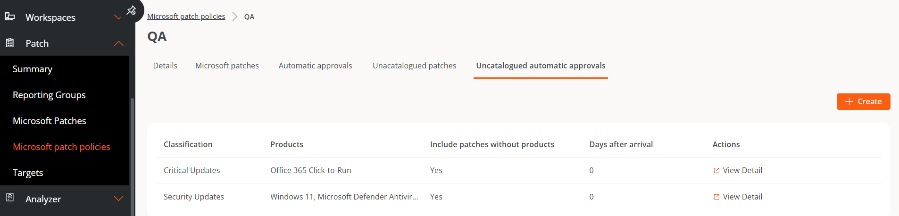
Unlisted automated approvals
This tab shows a table with the configured automatic approval rules, with the following fields:
-
Classification. Category assigned to the update.
-
Product. Name of the product to which the update applies.
noteUncataloged updates are reported by FlexxAgent according to the information obtained from the device; however, sometimes Windows does not provide information about the associated Product. For this reason, this field may appear empty.
-
Include updates without products. Indicates whether the automatic approval rule includes uncataloged updates without an associated product.
noteSince there may be uncataloged updates without an associated product, Flexxible recommends activating this option to ensure that this type of update is also included in the automatic approval process.
-
Days After Arrival. Number of days after the update arrives in the list, after which it will be automatically approved.
-
Actions. Contains the
View Detailsbutton that allows editing the rule.
Create an automatic approval rule for unlisted updates
It is possible to configure one or more automatic approval rules for uncataloged updates within the same update policy.
To create a new rule:
-
Access
Portal->Updates->Microsoft Update Policies. -
Select a policy.
-
Go to the
Unlisted automated approvalstab. -
Click on
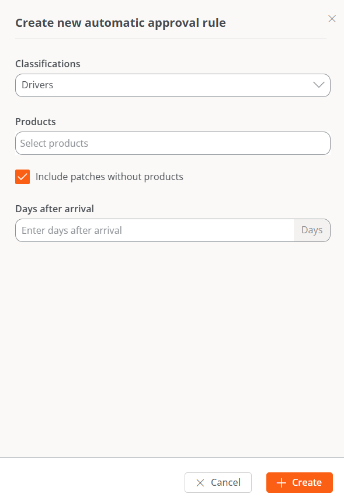
Newand define:- Classifications
- Products
- Days After Arrival
- Include updates without products
Since there may be uncataloged updates without an associated product, Flexxible recommends activating this option to ensure that this type of update is also included in the automatic approval process.
Unlisted Updates and Unlisted Automatic Approvals are available starting from version 25.6 of FlexxAgent.