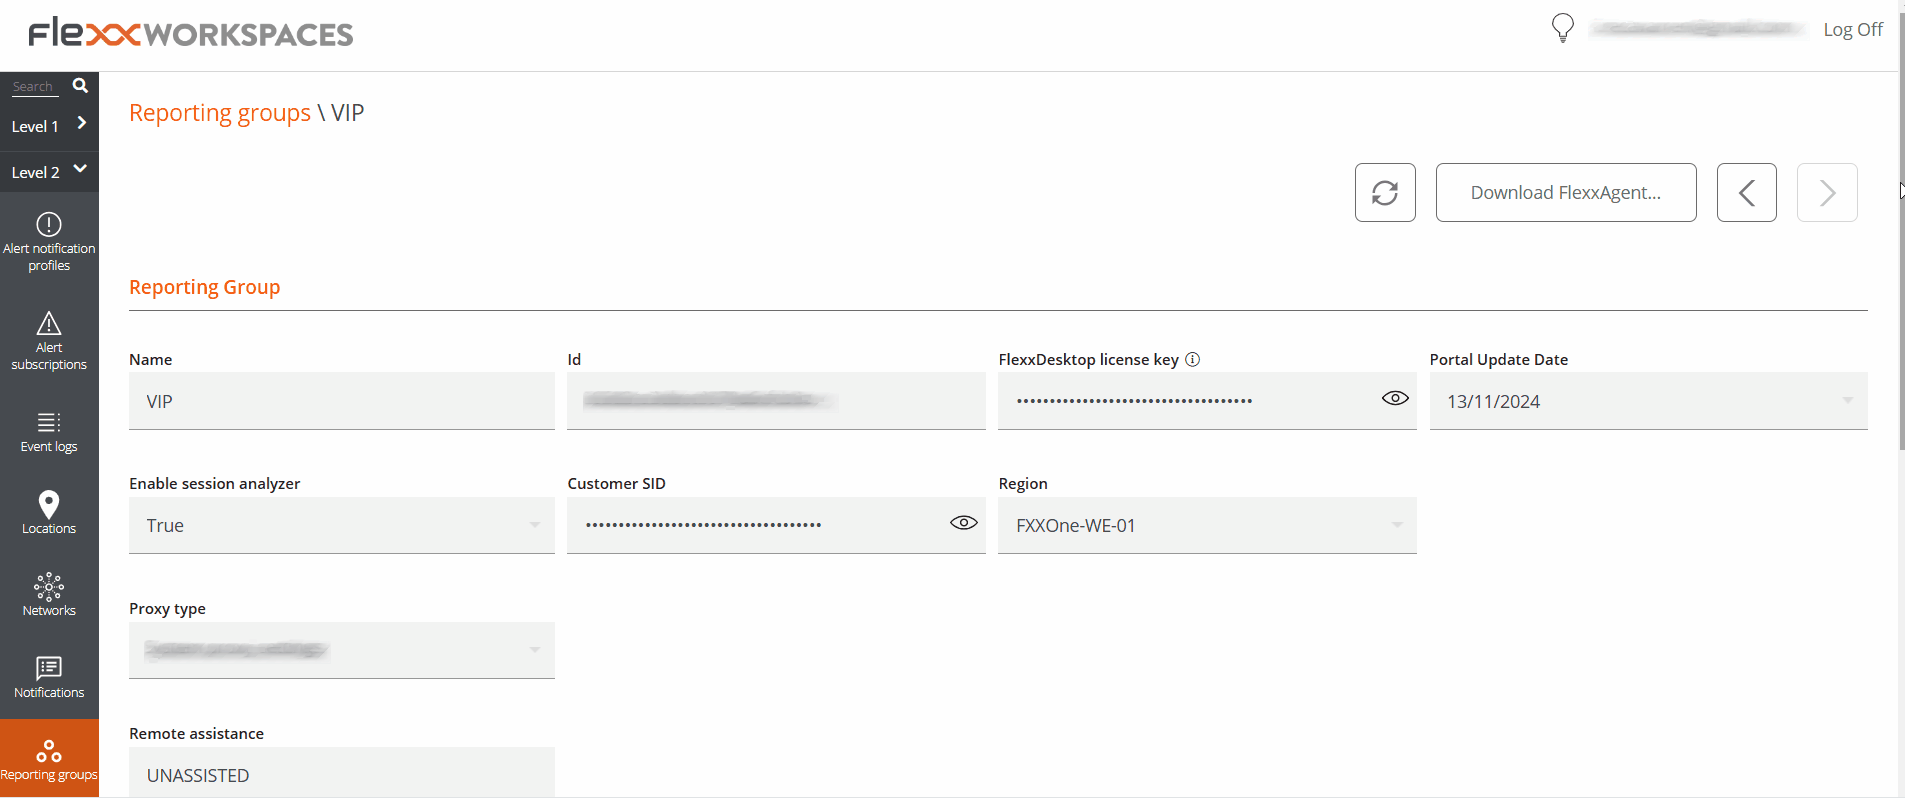
Reporting Groups
Reporting Groups allow you to create and manage groupings of devices within the same organization using different criteria. Their goal is to cover specific needs of departments, locations, or user collectives.
From this feature, you can:
- Check which users and roles have access to each group.
- See which devices are part of the group.
- Assign an update policy.
- Activate or modify remote assistance functionalities configured through FlexxAgent.
- Define a fishing pattern to automate device inclusion.
Creation of a reporting group
-
Go to
Portal->Settings->Reporting Groups. -
Click on
New. -
Fill out the form with the following fields:
-
Name. Group identifier.
-
Environment. Dropdown to choose the environment.
-
Fishing pattern. Regular expression (RegEx) used to automate the inclusion of devices based on the content of the attribute selected in the Fishing pattern field. The pattern evaluates the value stored in that attribute, whether it's text, numbers, or any other string represented in it.
noteIn versions prior to FlexxAgent 25.10, the fishing pattern is applied only to the device name.
-
Fishing pattern field. Device attribute on which the regular expression configured in the fishing pattern will be applied.
-
Patch policy target. Update policy assigned to the group.
-
Fishing pattern
The fishing pattern allows you to define regular expressions (RegEx) compatible with Java 8 for the automatic incorporation of devices into a report group.
The configured expression is compared with the content (value) of the attribute selected in the Fishing pattern field, whether it's text, numbers, or any other string represented in that field. It can be used to look for exact matches, texts that start or end in a specific way, or more advanced patterns. For partial matches, you can use * as a wildcard to indicate preceding or following content.
Examples:
| RegEx | Matches... |
|---|---|
.*2023$ | any text ending in 2023. |
.*abc.* | any text containing abc. |
^item | texts starting with item. |
\d{3} | strings formed by exactly three digits. |
To create and test regular expressions before configuring them in the production environment, Flexxible recommends using specialized tools like Regex101.
Considerations
- The system runs every hour an automatic process that searches for devices whose attribute value matches the configured expression. If found, it adds them to the corresponding reporting group.
- Regular expressions can have a maximum length of 250 characters.
- It is recommended to periodically review active expressions to avoid overlaps and conflicts among groups.
Fishing pattern field
This field determines which device attribute the regular expression defined in the fishing pattern will be applied to.
Available options
- Full Name. Applies the expression to the device's full name.
- Description. Applies the expression to the content of the device description field.
- OU. Applies the expression to the organizational unit.
- Current Subnet. Applies the expression to the string of the device's current subnet.

The Search Pattern Field is available from FlexxAgent version 25.10. In previous versions, the phishing pattern applies only to the device's name.
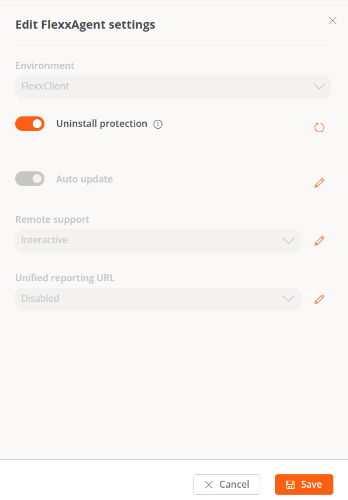
FlexxAgent Auto update
Allows activating the auto update of FlexxAgent on devices belonging to a group.
Settings
-
In the reporting group table, select the group(s) you want to configure.
-
Click on
Edit auto update. -
Choose one of the following options:
- Enable auto update
- Disable auto update
- Reset auto update

In organizations with the FlexxAgent Version feature, the automatic update always targets the Production environment, not Early.
Uninstallation Protection
This functionality prevents users from uninstalling FlexxAgent from the device. It can also be applied at the Product level.
Cases where protection is active
- The feature is enabled in the reporting group to which it belongs.
- The feature is deactivated in the reporting group (it is neither enabled nor disabled), but it is enabled at the Product level.
Requirements
- The configuration can only be performed by a user with the Organization Admin role.
- Available from FlexxAgent version 25.4.2.
Settings
The feature can be enabled in one or more groups:
- Go to
Portal->Settings->Reporting Groups. - Select the group and in the
Actionfield, click onAgent settings. - Edit the
Uninstallation protectionoption via the edit button. - Click on
Save.
Reporting groups inherit the settings made at the Product level; however, they can overwrite them.
For more information, see the documentation on Uninstallation Protection.
Set up devices for Wake on LAN (WoL)
This functionality allows defining specific devices that will execute auto power-on via Wake on LAN (WoL) in the selected reporting groups.
Settings
It's possible to set up to three devices for WoL execution, in case the process fails on one of them.
- In the table, select one (or more) reporting groups.
- Click on
Configure workspaces for WoL. - In the form, select the preferred devices that will handle turning on the machines via WoL.
- Click
Saveto apply the changes.
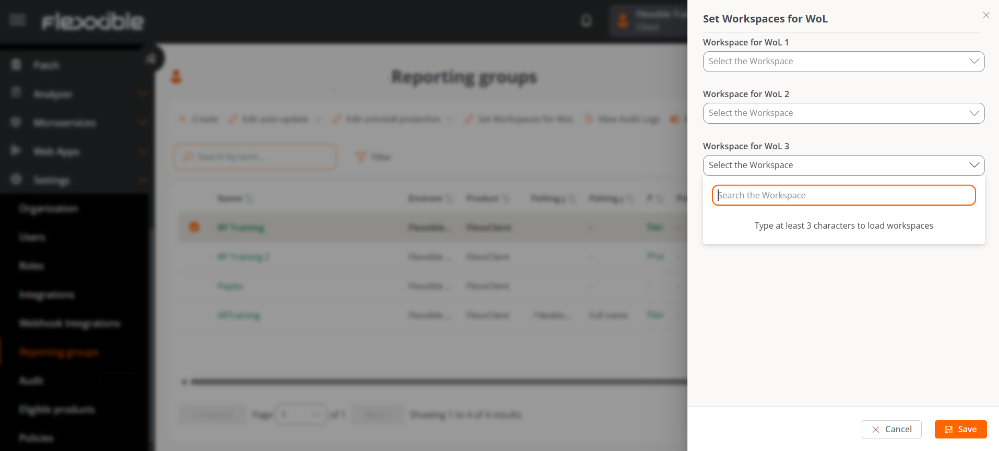
When several reporting groups are selected and one or more of the three form fields are left empty, they will also be saved as empty in those groups that previously had configured values.
Remove the configuration of WoL devices
To remove the devices associated with the WoL configuration:
- Select the corresponding reporting group again.
- Click
Set up workspaces for WoL. - Leave the three fields empty.
- Click
Saveto confirm the deletion.
The scheduling configuration is done at the level of Workspace Groups.
View audit log
Allows access to the organization Audit view.
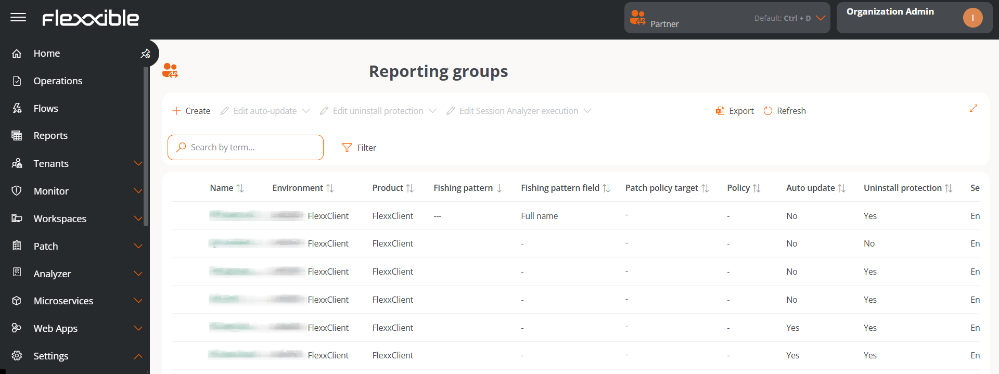
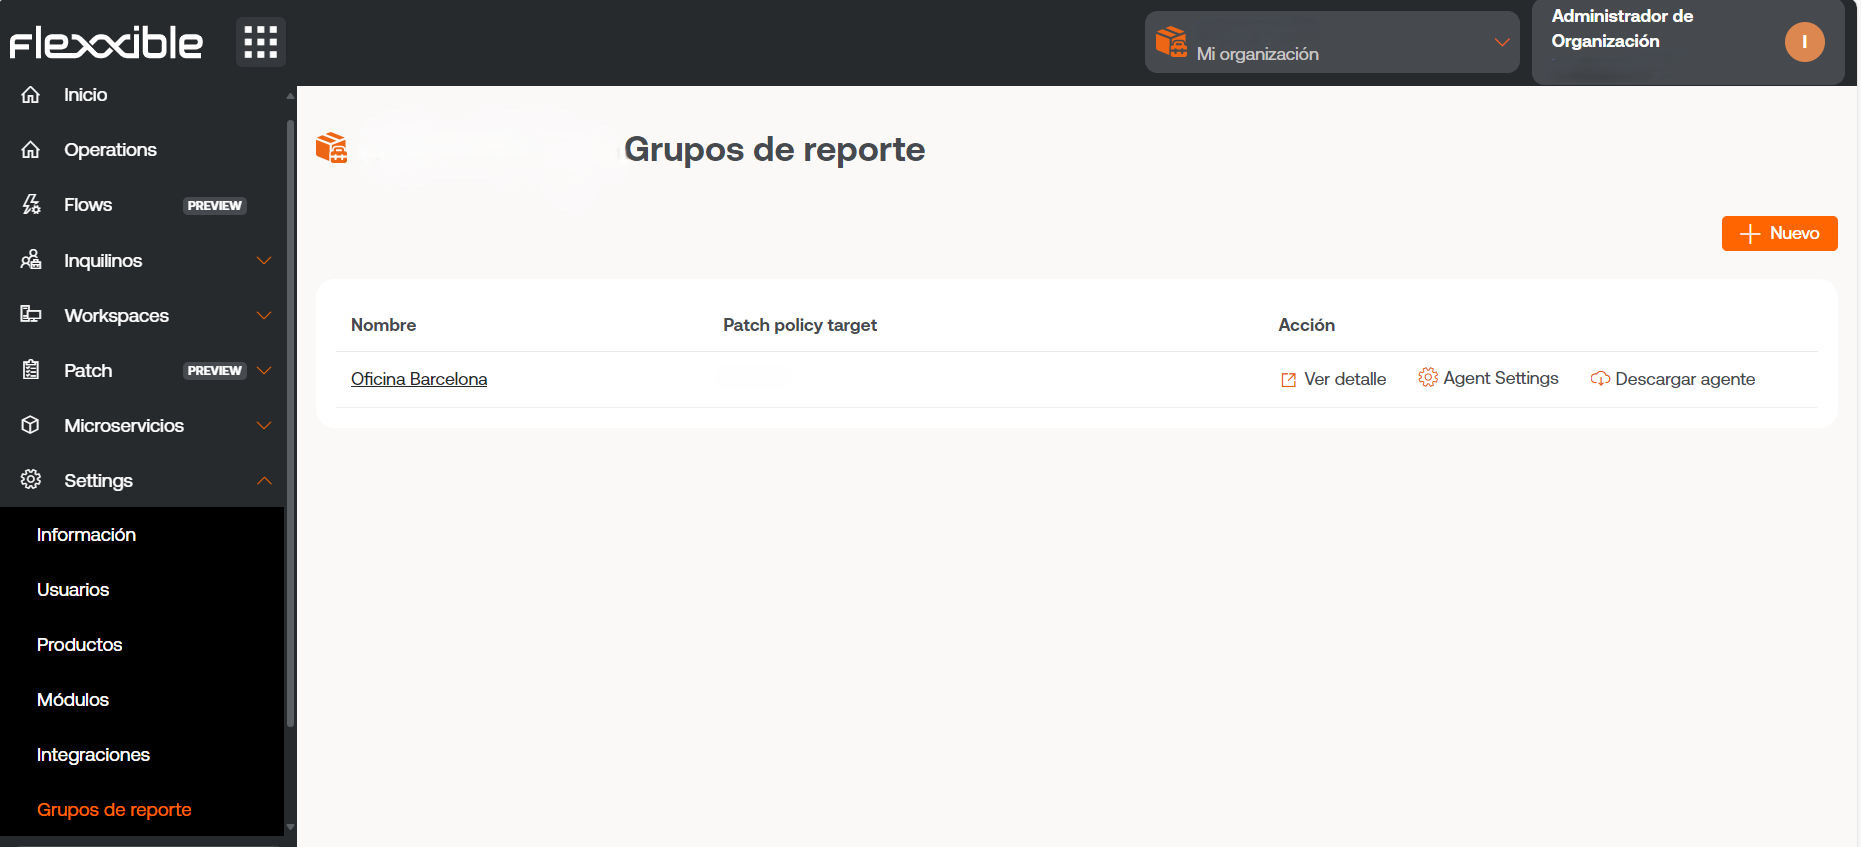
Reporting groups list
The list view shows the reporting groups with the following information:
- Name
- Environment
- Product
- Fishing pattern
- Fishing pattern field
- Patch policy target
- Policy
- Automatic Update
- Uninstallation protection
- Action (See details and Agent settings)
Details of a reporting group
Upon accessing the details, several tabs are displayed:
1. Details
Contains the general information of the group.
Through Edit, you can modify: Name, Environment, Fishing pattern, Fishing pattern scope, and Patch policy target.
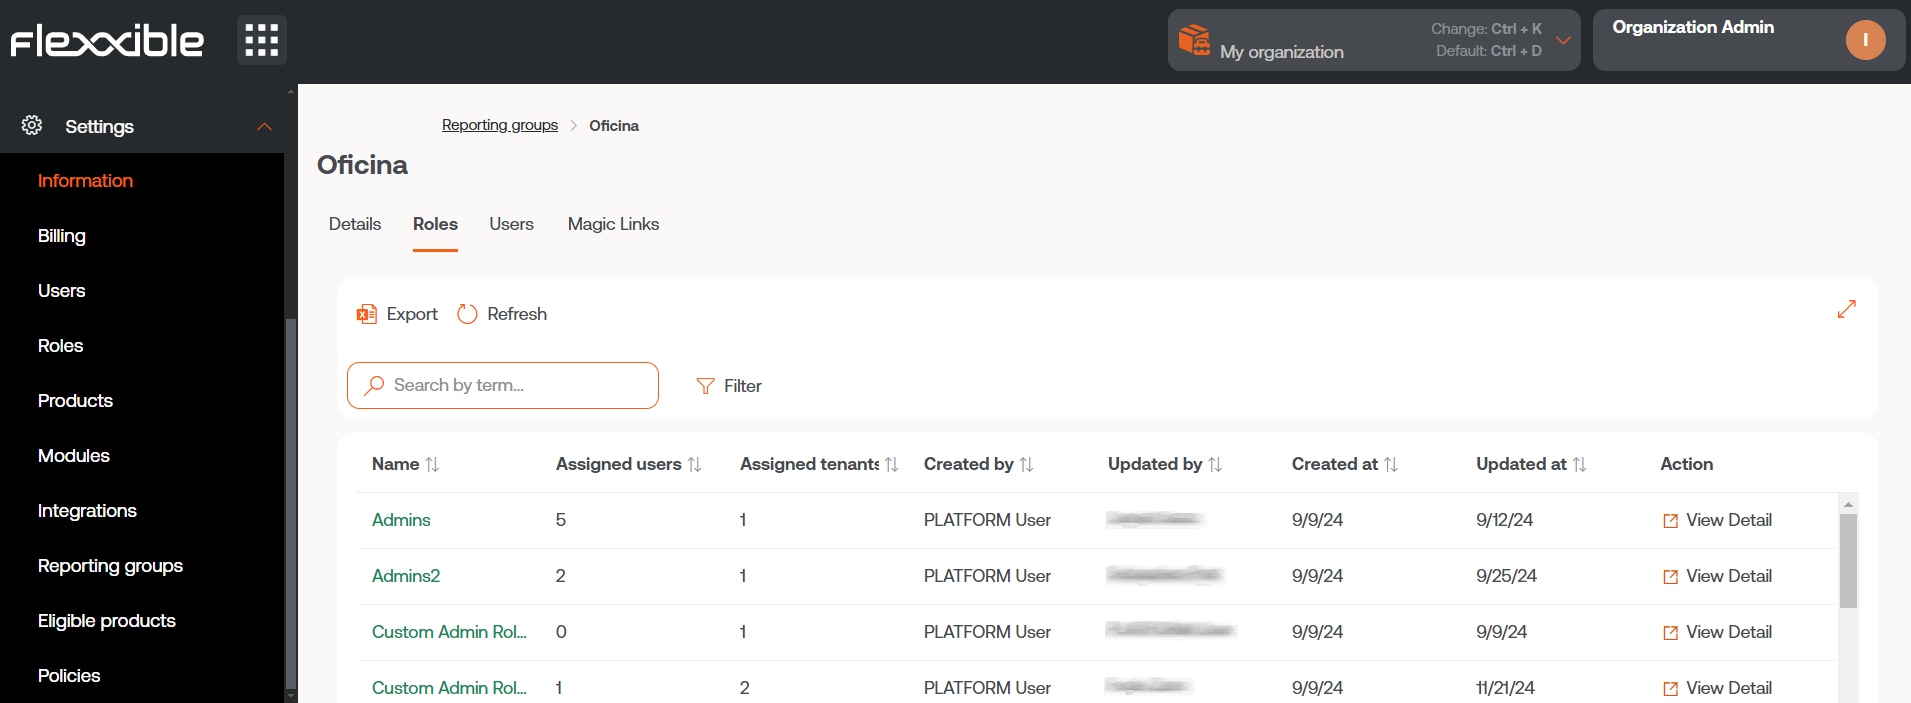
2. Roles
List of roles that can access the group. Includes:
- Name
- Assigned users
- Assigned tenants
- Created by
- Updated by
- Creation and update dates
- Action (Role details)
3. Users
List of users with access to the group. Includes:
- Full Name
- Department
4. Devices
List of devices associated with the group. Includes:
- Name
- Intel vPro Enterprise (compatibility)
- IP Address
- Operating System
- CPU Cores
- RAM
- Type (physical or virtual)
- Last connected user
5. Magic link
Users with the Organization Administrator role within a partner-type organization can generate and send Magic links to users so they can download FlexxAgent on their devices without requiring prior authentication.
This tab displays a table listing the magic links created in the reporting group, both from the Generate magic link button on the Portal homepage and from this tab.

The Create button allows for generating magic links in the reporting group to optimize access to the FlexxAgent download on devices, previously defining their expiration time.
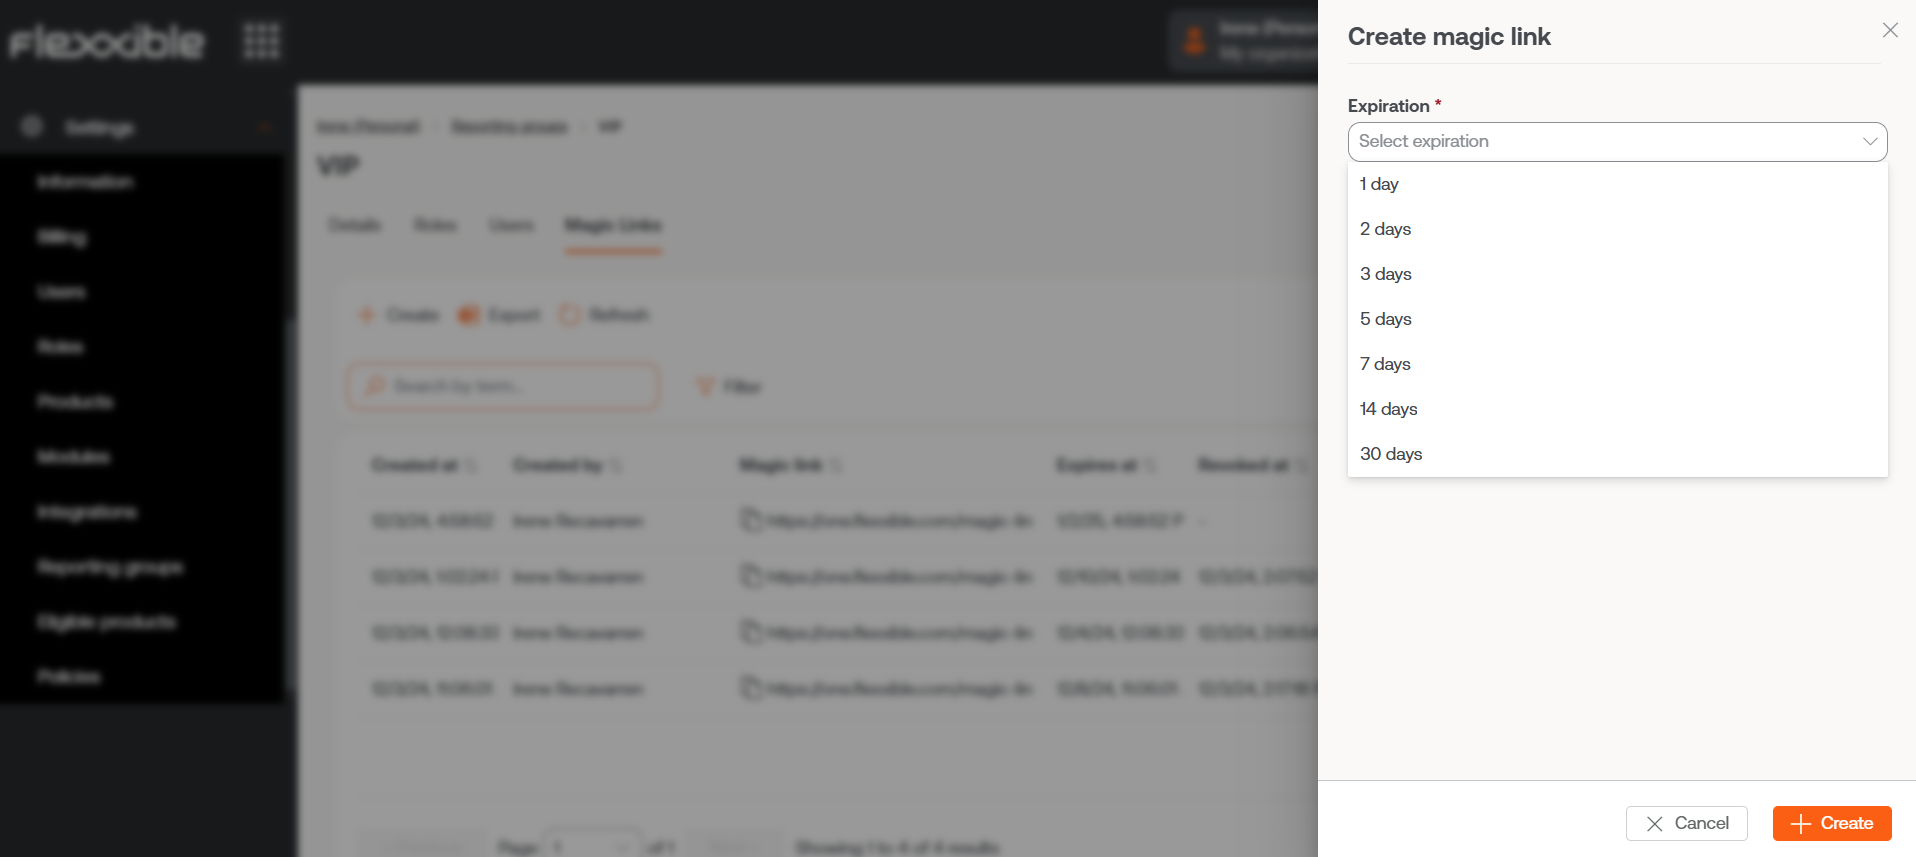
Export allows exporting the list in .xlsx format and Refresh updates the list of the magic links shown in the table.
The table provides specific data about the created magic link, such as the author, creation and expiration dates; it also indicates if it has been revoked and when. From here, you can also copy the created magic link to share it and revoke it when deemed appropriate.
More information about
Magic links
FlexxAgent Configuration (Flexxible Remote Assistance)
Administrators can define the type of remote assistance:
- Interactive (attended)
- Unattended
- Dynamic
- None

This configuration is set from Products. However, specific configurations can be made for report groups.
Download FlexxAgent
In FXXOne, you can download FlexxAgent directly from the reporting groups view. Simply click on Download agent to perform this action and then follow the installation steps.
This action can also be performed from the Portal home page.
Some of the configuration options of FlexxAgent are not visible to users with the Organization Administrator role.
Report Group Verification
It's possible to check the group a device belongs to from the Workspaces section in Portal, by accessing the device details. The history of assigned groups is also displayed there.
Removal of a device from a reporting group
- Access the Workspaces module ->
Level 2->Reporting groups. - Select the corresponding reporting group.
- In the
Devicestab, select the device. - Go to
Operations->Delete workspace.